Using the JS RUM API
How to use the JS RUM API to add custom data
[Supported in SpeedCurve RUM only]
The JS RUM API (lux.js) contains multiple properties, functions and attributes that can be used to customize SpeedCurve RUM to your application. You can define Custom Data using the LUX.addData() function of the API.
Tracking conversions with the JS RUM API
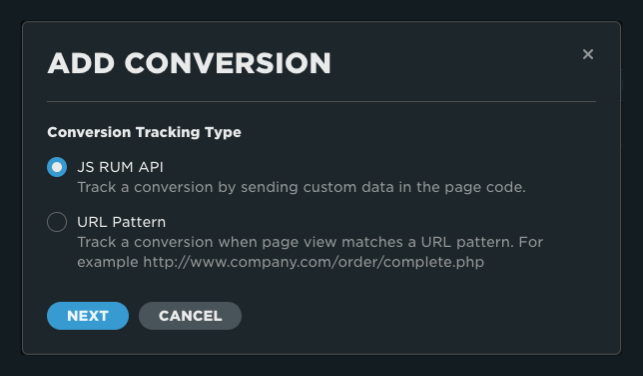
Step 1
To get started, after clicking on 'Add Conversion', select the JS RUM API option and click 'Next'.
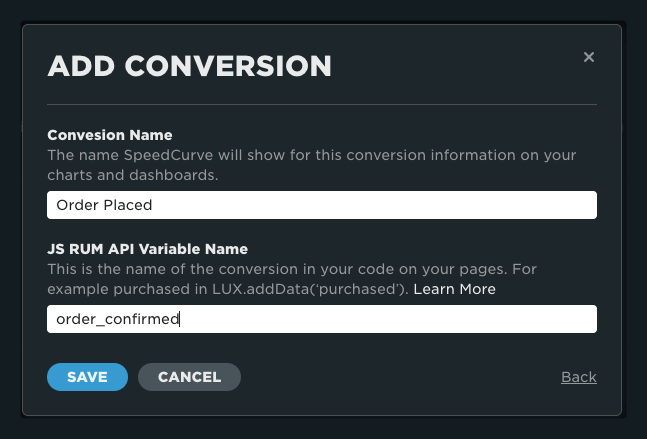
Step 2
Enter the name you want to use for the conversion. This is the value that will be shown in your charts and dashboards. Enter the JS RUM API variable name you will include in your code.
Step 3
Once complete, you will see your conversion listed on the custom data page.

To track a conversion with this method, you must use the LUX.addData API at the point where a user has converted.
On a static page
You can track conversions on a static page like the order confirmation page by calling LUX.addData() anywhere on the page after the RUM snippet.
LUX.addData('order_confirmed', 1)This data will be sent to SpeedCurve as part of the main RUM beacon.
As part of a single page transaction
You can also track conversions on pages where the conversion is triggered dynamically with JavaScript. For example after sending a POST request to finalise a transaction:
fetch('/transactions/confirm', { method: 'POST' }).then(response => {
        if (response.status === 200) {
            LUX.addData('order_confirmed', 1)
        }
})
If LUX.addData() is called after the main RUM beacon has been sent, then this data will be sent to SpeedCurve in a separate beacon. Otherwise it will be sent in the main beacon.
Adding dimensions and metadata using the JS RUM API
NoteYou can follow the same steps below to add custom metadata
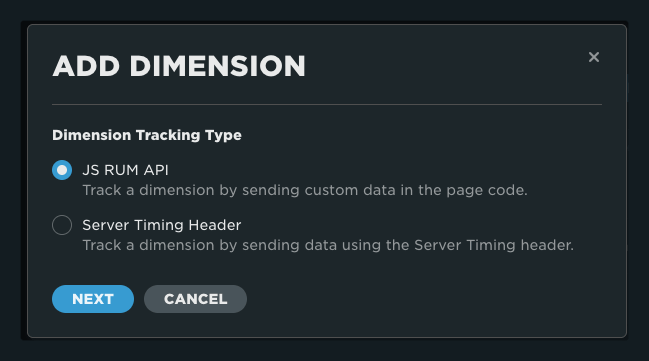
Step 1
To get started, after clicking on 'Add Dimension', select the JS RUM API option and click 'Next'.
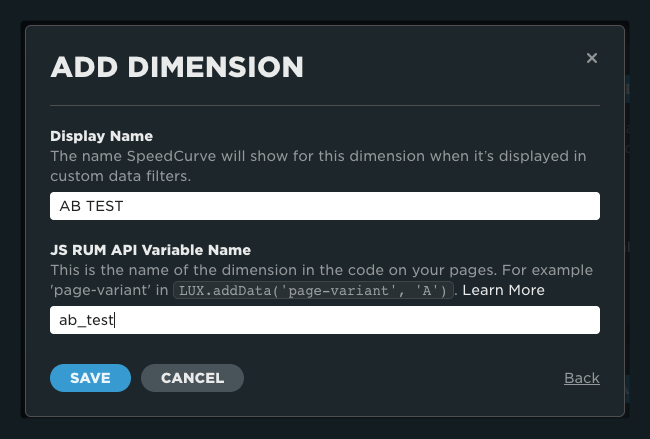
Step 2
Enter the name you want to use for the dimension. This is the value that will be shown in your charts and dashboards. Enter the JS RUM API variable name you will include in your code.
Step 3
Once complete, you will see your dimension listed on the custom data page.
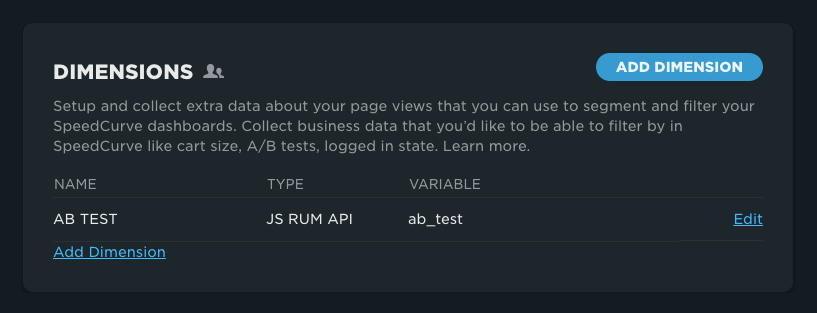
To create a dimension with this method, use the LUX.addData API when you want the dimension applied to the user's session.
Adding dimension data to a session
Usage:
LUX.addData(name, value);Using the example above for an AB TEST
LUX.addData('ab_test', 'variant1234');Adding metrics using the JS RUM API
NoteThe following steps can be used to define any metric type (Timing, Size or Numeric)
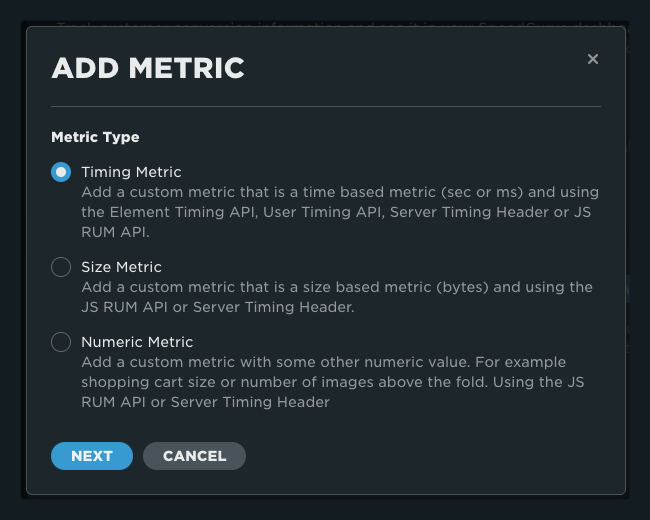
Step 1
To get started, after clicking on 'Add Metric', select the metric type and click 'Next'.
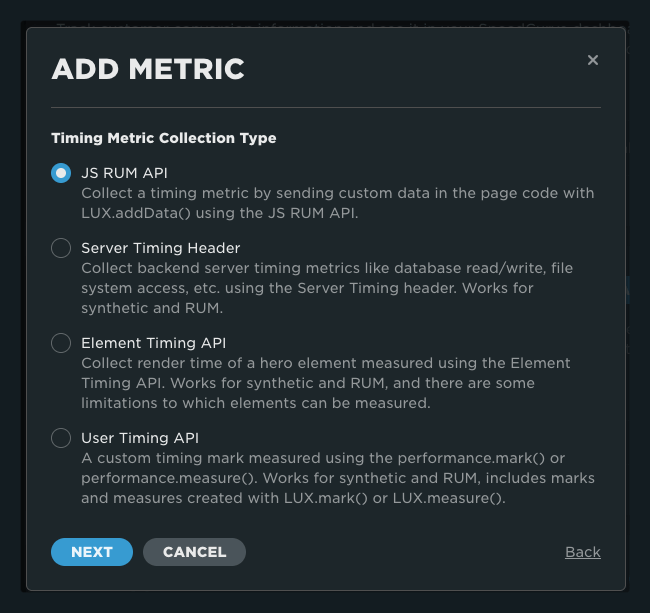
Step 2
Select JS RUM API and click next.
Step 3
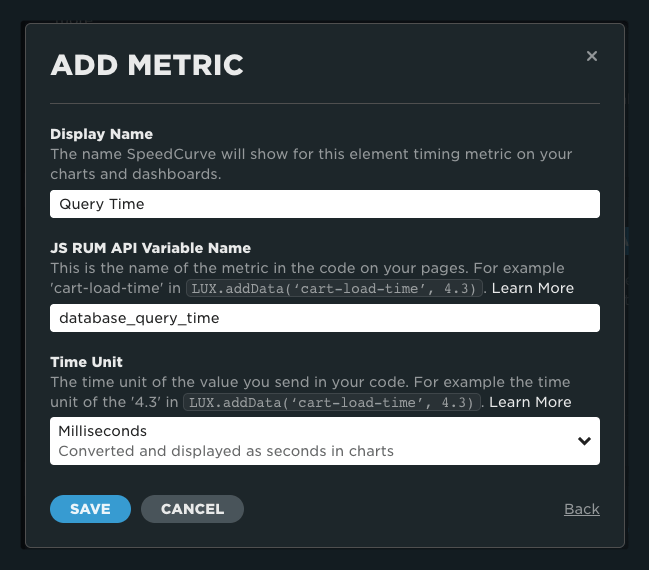
Enter the name you want to use for the metric. This is the value that will be shown in your charts and dashboards. Enter the JS RUM API variable name you will include in your code and the time unit for data collection in milliseconds or seconds. (Timing metrics will be displayed as seconds in your dashboards)
Step 4
Once complete, you will see your dimension listed on the custom data page.
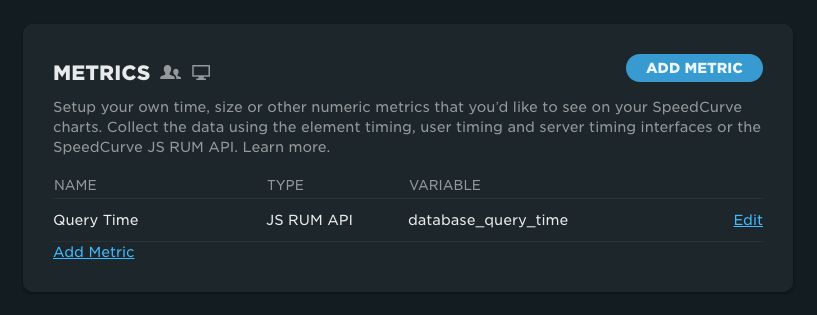
Adding metric data to a session
Usage:
LUX.addData(name, value);Metric type examples:
LUX.addData('database_query_time', '55.4'); //Custom timing metric
LUX.addData('memory', '5447'); //Custom size metric
LUX.addData('cart_item_count', '3'); //Custom numeric metric
Updated about 1 year ago