Using Element Timing
How to use Element Timing to create custom data in SpeedCurve RUM and Synthetic
[Supported in SpeedCurve RUM and Synthetic]
What is Element Timing?
The Element Timing API enables monitoring of when a specified DOM element is rendered. It is implemented using the elementtiming attribute of an html element.
Example:
<img src=”/images/logo.png” elementtiming="logo-shown" />
Element Timing: One true metric to rule them all?Read this post by Andy Davies for more information on how Element Timing can be used to understand and measure user experience.
https://www.speedcurve.com/blog/element-timing-one-true-metric/
Adding custom timing metrics with Element Timing
You can add a timing metric to SpeedCurve using Element Timing.
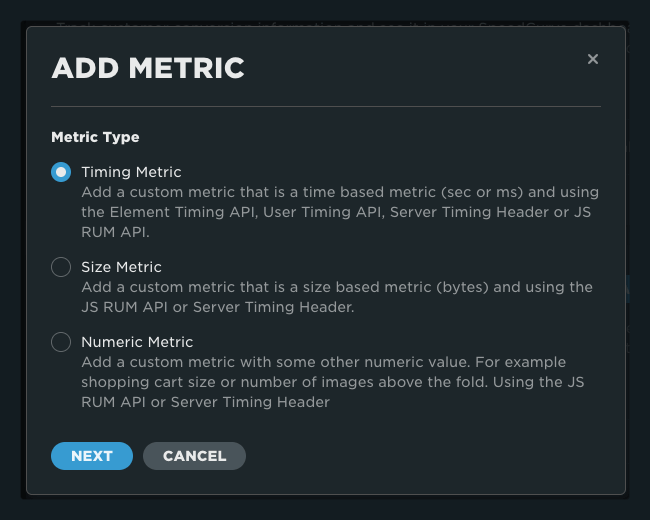
Step 1
To get started, after clicking on 'Add Metric', select 'Timing Metric' type and click 'Next'.

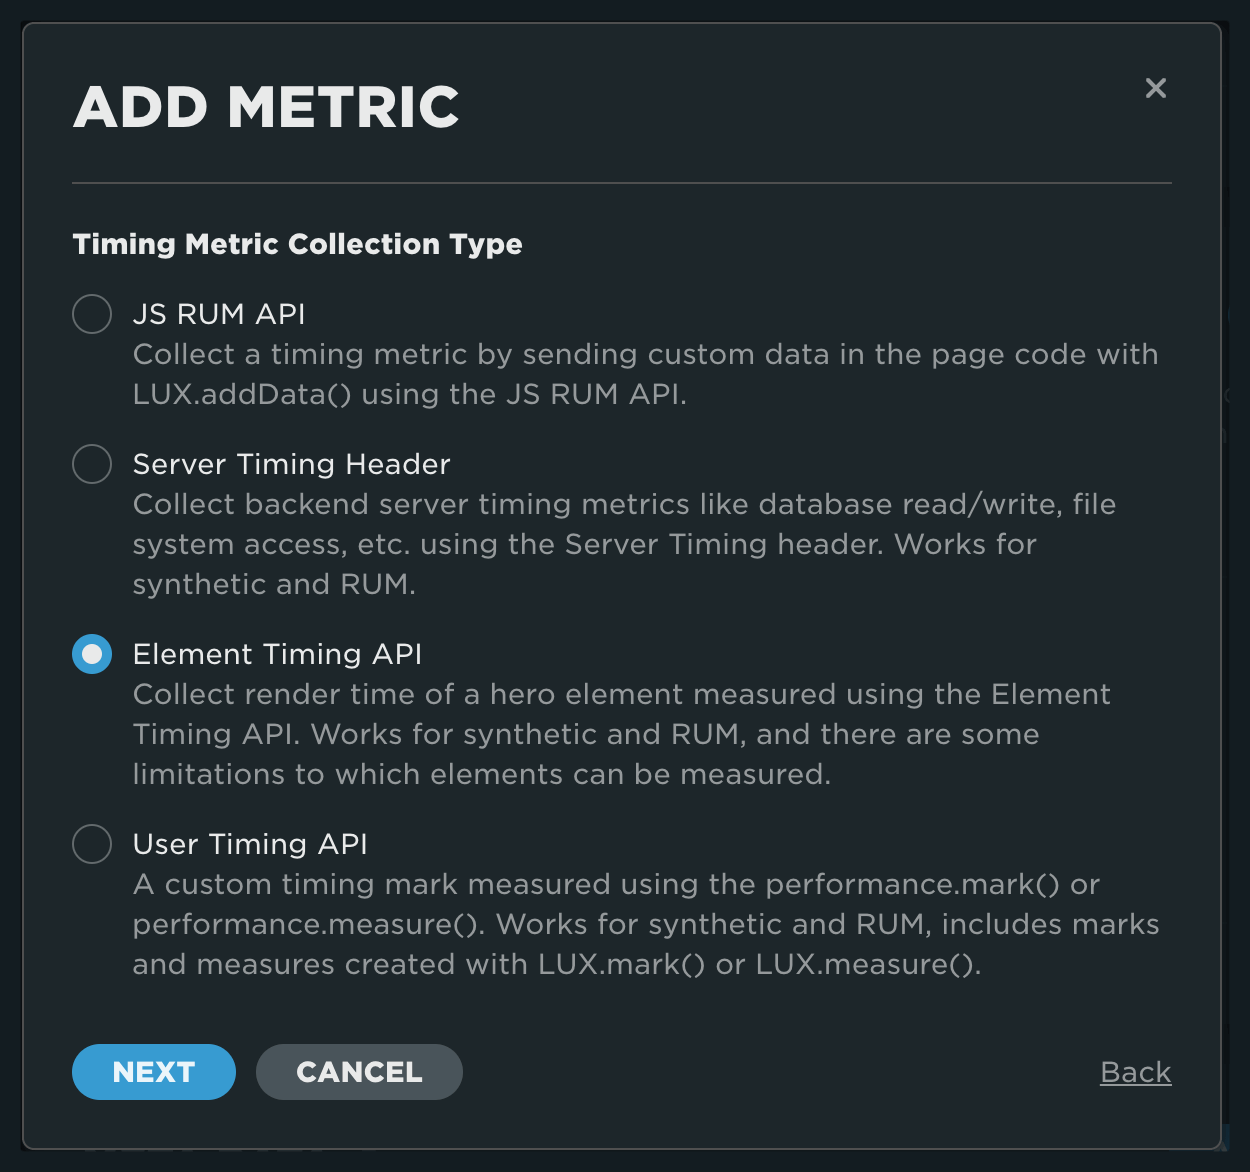
Step 2
Select Element Timing API and click 'Next'.

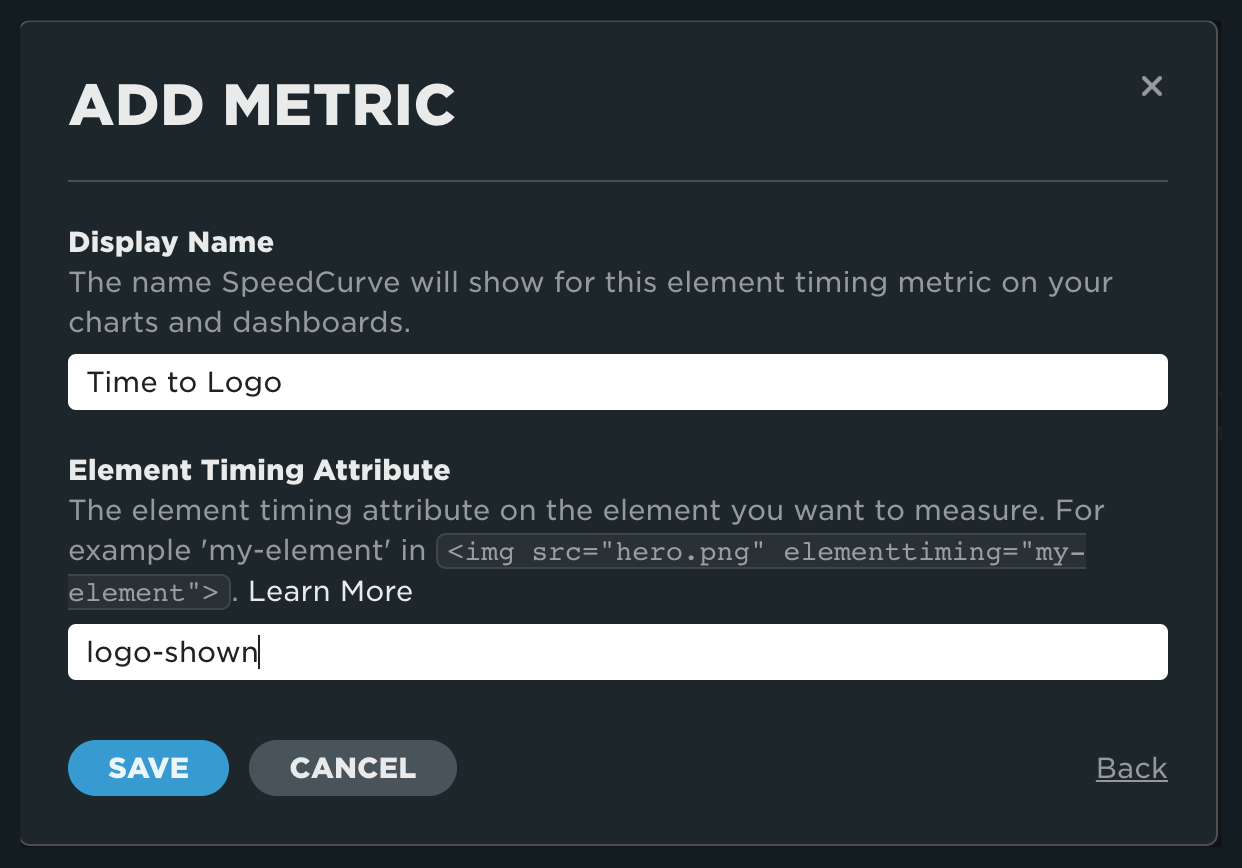
Step 3
- Add the name of the metric you'd like to see in your charts and dashboards
- Add the name of the element timing entry you want to collect

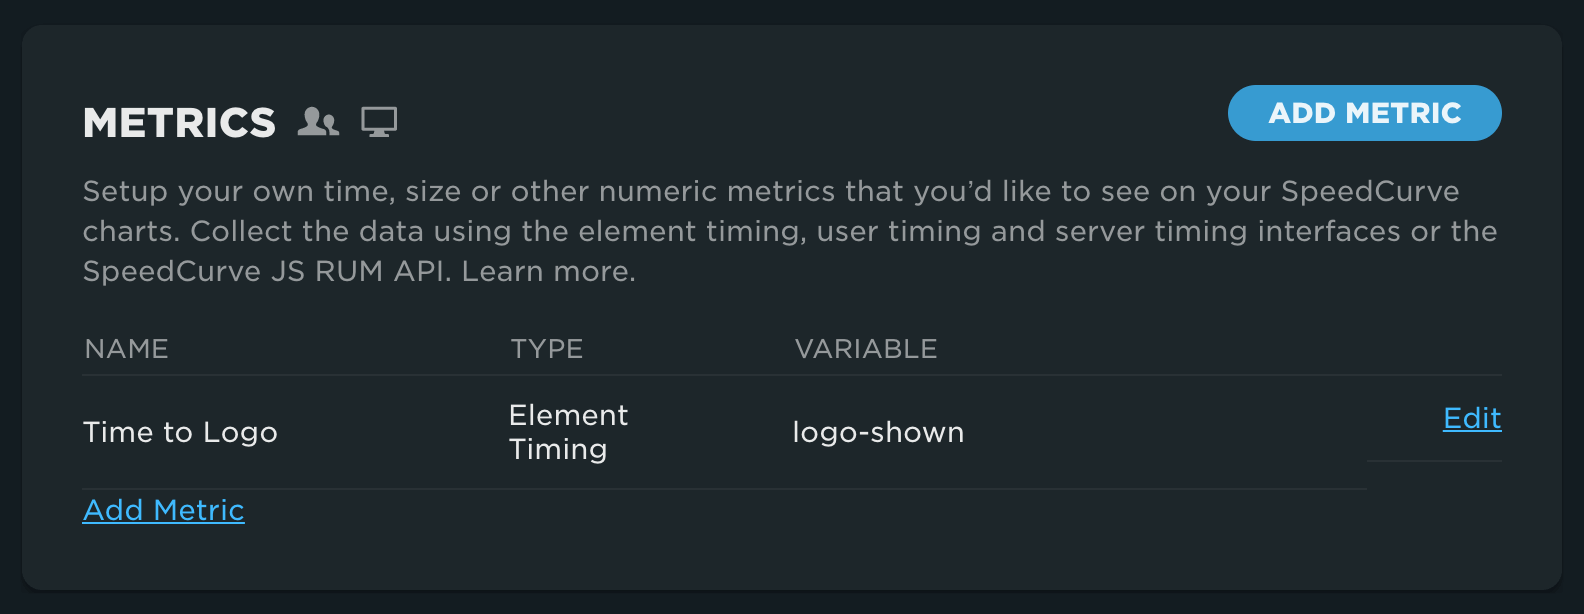
Step 4
Once complete, you will see your metric listed on the custom data page.

Updated 8 months ago